
В Shadowlands нас ждет великое множество систем прогресса, которые позволят игрокам детально и многими способами развивать и настраивать возможности своих персонажей. Каждый из ковенантов Темных Земель в своей локации имеет столицу-святилище, где можно найти различных торговцев, выдающих задания персонажей, стол приказов и многие другие подобные вещи, к которым игроки привыкли, что, кстати, сильно напоминает классовые оплоты из Legion и гарнизоны Warlords of Draenor.
Точно так же, как в случае с постройками гарнизона Warlords of Draenor, древами талантов оплотов из Legion, улучшениями военной кампании Battle for Azeroth, здесь имеется своя собственная аналогичная система, позволяющая постепенно восстанавливать поврежденные строения и усиливать персонажа. Но все устроено несколько сложнее, чем было раньше.
Эта система пока не работает и находится на раннем этапе разработки, но уже дает некоторое представление о себе. В специальном окошке улучшений имеется 5 категорий разной тематики (связаны со строениями святилища), в которых можно открывать по 3-5 бонусов, разделенных на ступени. Для открытия бонуса требуется валюта (пока указано золото) и некоторое время на проведение исследования. Пока информации о бонусах почти нет, но, судя по названиям, они бывают как повышающие мощь персонажа, так открывающие дополнительные возможности (например, ежедневные/локальные задания, дополнительные сокровища, могучих чемпионов противника, мощные ковенантские усиления) и увеличивающие число получаемого ресурса.
Вот такие категории имеют все святилища:
- Хранилище (“Reservoir”)
- Транспортная сеть (“Transport Network”)
- Направитель анимы (“Anima Divertor”)
- Улучшения для приключений (“Adventure Upgrades”)
- Уникальные для ковенанта: Фабрика поганищ (“Abomination Factory”), Новый суд (“The New Court”), Путь вознесения (“Path of Ascension”), Роща духов (“Spirit Grove”)
Также для открытия/активации категорий/бонусов требуется 4 типа ресурсов, которые указаны в интерфейсе и их можно “Вкладывать” с помощью отдельной кнопки:
- Освобожденная душа – Имея достаточно освобожденных душ, вы можете развивать особенности вашего Святилища ковенанта.
- Пепел души – Пепел души питает Костер сотворения.
- Стигия – Побочный продукт жестокого уничтожения души в Утробе.
- Анима ковенанта
Помимо вкладки “Улучшения” в интерфейсе также имеется еще одна, “Основы”, неизвестного назначения (пока не действует).

Полный список улучшений, значительная часть которых еще не имеет эффекта:
Цитировать
- Tier 1 – Mirror, Mirror – First tier of the Revendreth travel network
- Tier 2 – Through the Looking Glass – Second tier of the Revendreth travel Network
- Tier 3 – Mirror’s Edge – Third tier of the Revendreth travel network
- Tier 1 – Ziggaraut Now – First tier of the Maldraxxus Transport Network
- Tier 2 – A Keep Above – Second tier of the Maldraxxus Transport Network
- Tier 3 – Flying Fortress – Third tier of the Maldraxxus travel network
- Tier 1 – Nurtered Roots – First tier of the Ardenweald Travel Network
- Tier 2 – Fun with Fungi – Sceond tier of the Ardenweald travel network
- Tier 3 – Blossoming Network – Thirs tier of the Ardenweald travel network
- Tier 1 – Step of Faith – First tier of the Bastion travel network
- Tier 2 – Leap of Power – Second tier of the Bastion travel network
- Tier 3 – Eternal Paths – Third tier of the Bastion travel Network
- Tier 1 – Flowing Tendrils – First tier of the Bastion Anima Divertor
- Tier 2 – Streaming Threads – Sceond tier of the Bastion Anima Divertor
- Tier 3 – Flowing Power – Third tier of the Bastion Anima Divertor
- Tier 1 – Flowing Tendrils – First tier of the Maldraxxus Anima Divertor
- Tier 2 – Streaming Threads – Second tier of the Maldraxxus Anima Divertor
- Tier 3 – Flowing Power – Third tier of the Maldraxxus Anima Divertor
- Tier 1 – Flowing Tendrils – First tier of the Revendreth Anima Divertor
- Tier 2 – Streaming Threads – Second tier of the Revendreth Anima Divertor
- Tier 3 – Flowing Power – Third tier of the Revendreth Anima Divertor
- Tier 1 – Flowing Tendrils – First tier of the Ardenweald Anima Divertor
- Tier 2 – Streaming Threads – Second tier of the Ardenweald Anima Divertor
- Tier 3 – Flowing Power – Third tier of the Ardenweald Anima Divertor
- Tier 1 – Tactical Insight – First tier of the Ardenweald Adventure Upgrades
- Tier 2 – Forward Planning – Second tier of the Ardenweald Adventure Upgrades
- Tier 3 – Strategic Genius – Third tier of the Ardenweald Adventure Upgrades
- Tier 1 – Tactical Insight – First tier of the Bastion Adventure Upgrades
- Tier 2 – Forward Planning – Second tier of the Bastion Adventure Upgrades
- Tier 3 – Strategic Genius – Third tier of the Bastion Adventure Upgrades
- Tier 1 – Tactical Insight – First tier of the Revendreth Adventure Upgrades
- Tier 2 – Forward Planning – Second tier of the Revendreth Adventure Upgrades
- Tier 3 – Stratgeic Genius – Third tier of the Revendreth Adventure Upgrades
- Tier 1 – Tactical Insight – First tier of the Maldraxxus Adventure Upgrades
- Tier 2 – Forward Planning – Second tier of the Maldraxxus Adventure Upgrades
- Tier 3 – Strategic Genius – Third tier of the Maldraxxus Adventure Upgrades
- Tier 1 – First Planting – First tier of the Ardenweald Spirit grove
- Tier 2 – Initial Growth – Second tier of the Ardenweald Spirit grove
- Tier 3 – Nurtured Souls – Third tier of the Ardenweald Spirit grove
- Tier 4 – Flourishing Beds – Fourth tier of the Ardenweald Spirit grove
- Tier 5 – Final Forms – Final tier of the Ardenweald Spirit grove
- Tier 1 – Sparring Buddy – First tier of the Bastion Path of Ascension
- Tier 2 – Proving Time – Second tier of the Bastion Path of Ascension
- Tier 3 – Fighting Talk – Third tier of the Bastion Path of Ascension
- Tier 4 – Blessed Champion – Fourth tier of the Bastion Path of Ascension
- Tier 5 – Ascended Warrior – Final tier of the Bastion Path of Ascension
- Tier 1 – Build a Buddy – First tier of the Maldraxxus Abomination Factory
- Tier 2 – Crafting limbs – Second tier of the Maldraxxus Abomination Factory
- Tier 3 – Bring them to Life – Third tier of the Maldraxxus Abomination Factory
- Tier 4 – Forged Friends – Fourth tier of the Maldraxxus Abomination Factory
- Tier 5 – Best Fiends Forvever – Final tier of the Maldraxxus Abomination Factory
- Tier 1 – Party Time – First tier of the Revendreth – The New Court
- Tier 2 – Dress to Impress – Second tier of the Revendreth – The New Court
- Tier 3 – Death of the Party – Third tier of the Revendreth – The New Court
- Tier 4 – Crowd Management – Fourth tier of the Revendreth – The New Court
- Tier 5 – Exclusive Ticket – Final tier of the Revendreth – The New Court
- Party Time – First option for Revendreth – The New Court
- Dress to Impress – Second option for Revendreth – The New Court
- Death of the Party – Third option for Revendreth – The New Court
- Crowd Management – Fourth option for Revendreth – The New Court
- Exclusive Ticket – Fifth option for Revendreth – The New Court
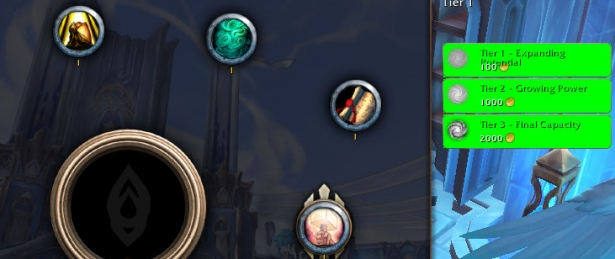
- Tier 1 – Expanding Potential – First tier of the Revendreth Reservoir Upgrades
- Tier 2 – Growing Power – Second tier of the Revendreth Reservoir Upgrades
- Tier 3 – Final Capacity – Third tier of the Revendreth Reservoir Upgrades
- Tier 1 – Expanding Potential – First tier of the Bastion Reservoir Upgrades
- Tier 2 – Growing Power – Second tier of the Bastion Reservoir Upgrades
- Tier 3 – Final Capacity – Third tier of the Bastion Reservoir Upgrades
- Tier 1 – Expanding Potential – First tier of the Ardenweald Reservoir Upgrades
- Tier 2 – Growing Power – Second tier of the Ardenweald Reservoir Upgrades
- Tier 3 – Final Capacity – Third tier of the Ardenweald Reservoir Upgrades
- Tier 1 – Expanding Potential – First tier of the Maldraxxus Reservoir Upgrades
- Tier 2 – Growing Power – Second tier of the Maldraxxus Reservoir Upgrades
- Tier 3 – Final Capacity – Third tier of the Maldraxxus Reservoir Upgrades
- Temple of Purity – Divert anima to the Temple of Purity, allowing access to a special treasure.
- Temple of Courage – Divert anima to the Temple of Courage, allowing you to fight an enemy champion.
- Temple of Humility – Divert anima to the Temple of Humility, unlocking a new World Quest.
- Eternal Forge – Divert anima to the Eternal Forge, unlocking new Daily Quests.
- Temple of Loyalty – Divert anima to the Temple of Loyalty, allowing you to challenge a powerful foe.
- Temple of Wisdom – Divert anima to the Temple of Wisdom, allowing access to mighty Kyrian enhancements.
- Tirna Eas – Divert anima to Tirna Eas, allowing access to a special treasure.
- Tirna Fenn – Divert anima to Tirna Fenn, allowing you to fight an enemy champion.
- Tirna Vaal – Divert anima to Tirna Vaal, unlocking a new World Quest.
- Tirna Glayn – Divert anima to Tirna Glayn, unlocking new Daily Quests.
- Tirna Scithe – Divert anima to Tirna Scithe, allowing you to challenge a powerful foe.
- Tirna Kaithe – Divert anima to Tirna Kaithe, allowing access to mighty Night Fae enhancements.
- House of the Chosen – Divert anima to the House of the Chosen, allowing access to a special treasure.
- House of Constructs – Divert anima to the House of Constructs, allowing you to fight an enemy champion.
- House of Plagues – Divert anima to the House of Plagues, unlocking a new World Quest.
- House of Eyes – Divert anima to the House of Eyes, unlocking new Daily Quests.
- Theatre of Pain – Divert anima to the Theatre of Pain, allowing you to challenge a powerful foe.
- House of Rituals – Divert anima to the House of Rituals, allowing access to mighty Necrolord enhancements.
- Cathedral Ward – Divert anima to the Cathedral Ward, allowing access to a special treasure.
- Forest Ward – Divert anima to the Forest Ward, allowing you to fight an enemy champion.
- Castle Ward – Divert anima to the Castle Ward, unlocking a new World Quest.
- Village Ward – Divert anima to the Village Ward, unlocking new Daily Quests.
- Military Ward – Divert anima to the Military Ward, allowing you to challenge a powerful foe.
- Ember Ward – Divert anima to the Ember Ward, allowing access to mighty Venthyr enhancements.
Опубликовано: 2020-04-12 21:31:26